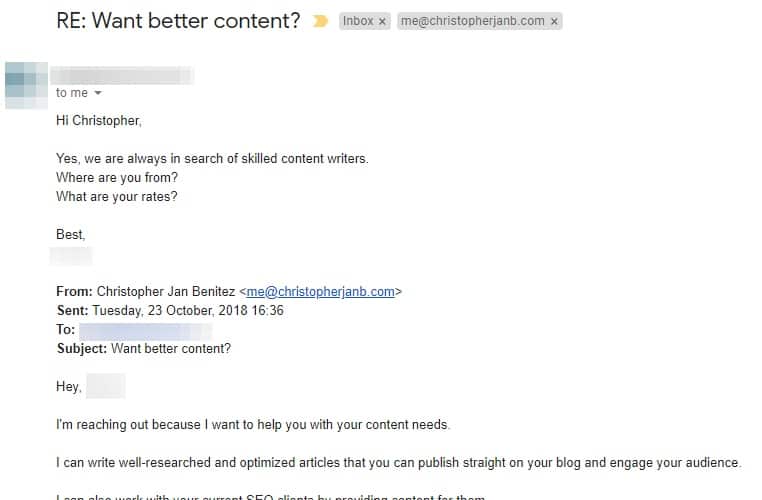
So you just kicked off your career in freelancing.
You now that gathering contacts and getting the word out about the services you offer can be a challenge. You may have skills that people would pay for. However, finding leads who would pay for your skills is a different story.
This is because, as a freelancer who is just starting out, your network is still very small.
But don’t fret. Getting out from this predicament is not as hard as you think. You just need to use the right tool.
This is where email marketing comes in.
Why do you need email marketing?
It’s simple, really. Email marketing is not just affordable and easy to use. It is also an ideal investment and solution if you’re in for the long haul.
With email marketing, you can do the following:
Grow your list slowly but surely
It’s important to integrate email marketing into your contact-gathering strategy. But you need to remember that it is not an overnight solution. You don’t send out emails today and expect thousands of subscribers tomorrow. Email marketing doesn’t work like that.
Email marketing is a long-term investment. It will help grow your subscriber list and customer base. But it’s going to be a gradual, steady process.
Once you do get more subscribers and prospects, it’s much easier to make them stay.
Foster better and deeper relationships
Email isn’t the same as face-to-face interactions with your prospective clients. Still, it’s a whole lot more personal than paid ads, which a majority of users consider annoying.
People email one another using laptops and smartphones. Despite its cold nature, you can still personalize your emails as if you are talking to the reader directly. Some basic techniques include using the subscriber’s first name in certain areas of the email, such as the subject line and greeting.
Turn subscribers into clients
Email marketing is the perfect medium for showcasing your skills in order to get more clients.
Prove that you are an expert in your field and entice subscribers to hire you. Do this by promoting your best content pieces that provide your audience with valuable insight via email.
Let’s say you’re a freelance writer who specializes in writing informative content centered around tech. Your goal is to reach out to the managers of tech companies who might be interested in your services.
First, you must create a lead magnet about technology
Create something that will interest decision-makers in the tech industry. You may need to do extensive research about tech topics and provide unique insights into the niche. Generic topics about tech that have been done to death won’t work.
Once you’ve produced the lead magnet, it’s time to set up an email form. Ask readers to fill out their name and email so they can receive the exclusive content. In exchange, their information will go straight to your email list.
From here, you can craft a drip email campaign to email subscribers for your writing services. This will only work if the quality of the lead magnet is great. If so, then your chances of converting them into clients are high.
These are just the tip of the iceberg when it comes to what you can achieve with email marketing. You can accomplish a lot of goals with too—as long as you properly plan and execute your email campaigns.
How to start with email marketing
If you are ready to go on your email marketing journey and want to have a successful career in freelance, then you have to start email marketing the right way. Here’s how:
Find the best email service provider for you
With countless email service providers (ESPs) available, narrowing down the most suitable one for you can be a daunting task. After all, choosing an ESP does involve making certain considerations.
This doesn’t have to be the case, though. You just need to do the proper research in order to make an informed decision.
First, think about your budget.
Email marketing does not have to be expensive. Pricey ESPs work best for companies and enterprise. There are affordable platforms for freelancers on a budget.
Also, don’t subscribe to an ESP just because people are raving about it. It’s best to try out the tool first and form your opinion from there. You’re the one using the tool, so what people say shouldn’t matter.
Some people leave sour reviews about free or cheap ESPs. However, if they work like a charm for you, then use them! There’s no accounting for taste, really.
Next, outline all the features you’ll need in an ESP.
Not a design expert but want to create emails that grab attention? Then you need an ESP that comes with a range of beautiful templates that you can tweak in an instant.
Do you want the ability to analyze and measure email performance on a regular basis? Then you need an ESP that offers useful analytics.
Good customer support is also crucial for freelancers. Your ESP’s customer support team should be able to quickly assist if you simply need help with the service. This is so you can focus on working for your clients.
Looking for an ESP that has all these features and more? Then look no further than Campaign Monitor, an ESP that gives you the power to design beautiful, professional-looking emails, create highly personalized customer journeys, and analyze and monitor email data.
Make it easy for people to subscribe
Your ultimate goal is to gather contacts who you’ll hopefully convert into paying clients. Therefore, make signing up to your email list as convenient as possible for.
Provide visitors with several ways to sign up for your email list. Place CTAs on various pages of your website like your homepage, your blog posts, a dedicated landing page like this one Elna Cain’s website.
Make the process simple for your prospective clients. It will incline them to subscribe to your newsletter and learn what you can offer.
Get to know your subscribers
Ask people for information from your subscription forms that will help with your personalization and segmentation efforts. Aside from their name and email addresses, your form should also contain the following:
- The industry that the potential subscriber is in
- Their position in the company? (Junior Marketer, CEO, Business Owner, etc.)
- The type of newsletter content they’d like to receive
You can ask more questions depending on what service you offer. Ultimately, this information will enable you to:
- Personalize your email templates according to the receiver (different templates for different industries)
- Segment your lists and deliver unique content to each list (content for CEOs is different from content for marketers)
- Deliver relevant content that your subscribers want to know.
Automate your emails
Being a freelancer means juggling the work for multiple clients all at once. This will likely leave you with very little time to do anything else. However, your ESP can do the work for you.
Automating your emails saves you time from manually sending emails to each and every one of your subscribers. Set up your email automation once as well as the triggers and rules that determine when to send the email.
If done right, then all you need to do is sit back, relax, and watch the engagement rate skyrocket!
One of the easiest (and most effective) emails to automate is your welcome series. Set up the trigger on your ESP and it will send your welcome email to every new subscriber automatically.
The timing of the email matters too. Research has revealed that it is best to send the email within the same day that a subscriber signs up.
Here’s a simple yet attention-grabbing welcome email you can use for inspiration.
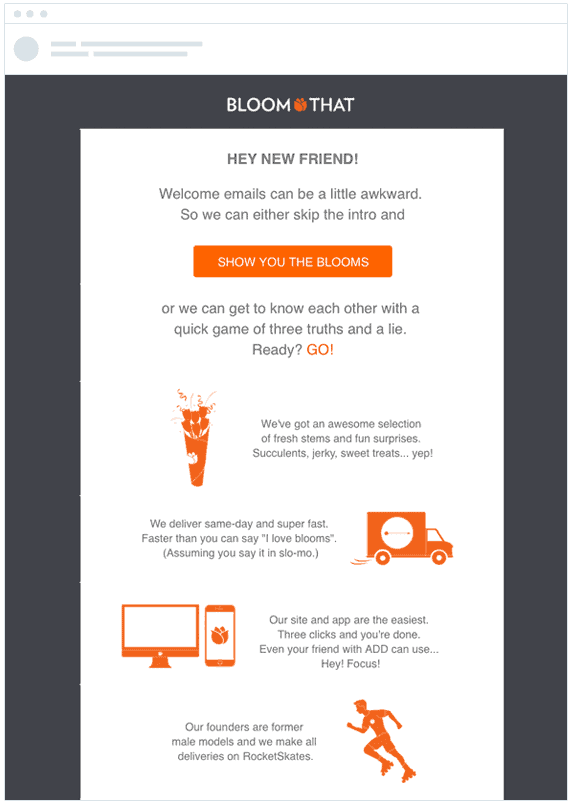
(Source)
Other emails you can automate include:
- Client inquiry emails – Send an automated email to subscribers who inquire about your services or asks for a quote. In the message of your email, tell them you’ve received their inquiry and that you will be getting back to them within a specific timeframe. This will make them feel more valued as clients.
- Thank you emails – Send an automated thank you email whenever you receive payment from a client for services rendered. It shows that you appreciate their business, which builds loyalty and develops your relationship with them.
- Birthday emails – If the subscriber indicated their birth date, you can offer them a freebie or a discount for your services.
So do you know now how to start with email marketing?
This post is by no means an extensive email marketing guide. The purpose of these tips is to simply to help you get the best start you can with email marketing. If you follow the advice above, then you won’t waste your time, effort, and hard-earned money.
Getting a good grasp of the fundamentals will also make improving your future campaigns and strategies much easier for you.
That being said, you have to keep in mind that there is no one-size-fits-all email marketing strategy that applies to every freelancer. Your strategy will depend on numerous variables such as your budget, the type of service you offer, the industries you cater to, and so on and so forth. This means that your strategies will differ from other freelancers.
There is one thing that will be the same for you and every other freelancer out there. You all need to master these email marketing basics.
Want to receive content like this from your inbox? Fill out the form below to join my mailing list!